Mastering the QIDI Tech X-CF Pro: A Comprehensive Guide to Changing the Print Head
Introduction
The QIDI Tech X-CF Pro is a powerhouse in the 3D printing world, renowned for its precision and versatility. To keep it running smoothly, knowing how to change the print head is essential. Whether you’re switching to a different nozzle size or replacing a worn-out component, this guide will walk you through the process, ensuring your printer stays in tip-top shape.
Understanding the QIDI Tech X-CF Pro Print Head
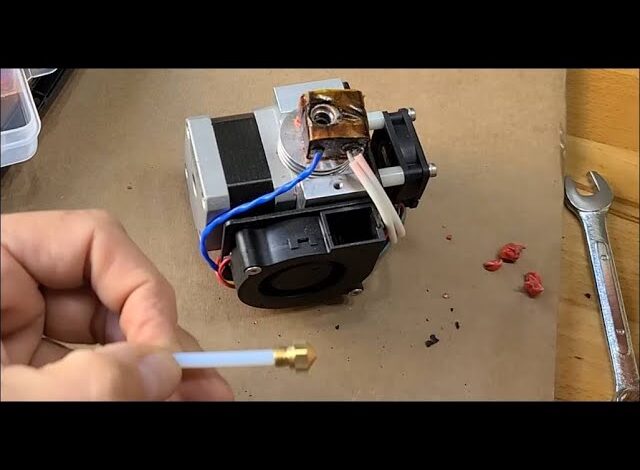
Before diving into the replacement process, it’s crucial to understand the components of the print head:
- Nozzle: The part that extrudes the filament.
- Heat Block: Heats the nozzle to the desired temperature.
- Thermistor: Measures the temperature of the heat block.
- Heater Cartridge: Provides the necessary heat to the heat block.
Familiarizing yourself with these parts will make the replacement process more straightforward.
When Should You Change the Print Head?
Regular maintenance is key to high-quality prints. Here are some signs that indicate it’s time to change the print head:
- Poor Print Quality: If your prints are coming out with defects, it might be due to a worn-out nozzle.
- Frequent Clogs: Constant clogging can signal that the nozzle is damaged or dirty.
- Visible Damage: Cracks or deformities on the print head components necessitate immediate replacement.
Regularly inspecting your printer and being aware of these signs can save you from bigger headaches down the line.
Tools You’ll Need
Gather the following tools before starting the replacement:
- Allen Wrenches: Typically included with your printer.
- Adjustable Wrench: For loosening and tightening nuts.
- Needle-Nose Pliers: Useful for handling small components.
- Thermal Gloves: To protect your hands from hot components.
- Replacement Print Head: Ensure it’s compatible with the QIDI Tech X-CF Pro.
Having these tools on hand will make the process smoother and more efficient.
Safety First!
Before you begin, ensure the printer is turned off and unplugged. Allow the print head to cool down completely to avoid burns. Wearing thermal gloves can provide additional protection.
Step-by-Step Guide to Changing the Print Head
1. Power Down and Cool Off
- Turn Off the Printer: Switch off and unplug the printer.
- Cool Down: Wait for the print head to reach room temperature.
2. Remove the Filament
- Unload Filament: Using the printer’s interface, unload any filament from the extruder.
- Cut the Filament: Trim the filament near the entry point to prevent tangling.
3. Detach the Print Head
- Loosen Screws: Use the appropriate Allen wrench to remove the screws securing the print head.
- Disconnect Wires: Carefully unplug the thermistor and heater cartridge wires.
- Remove the Print Head: Gently detach the print head from the carriage.
4. Install the New Print Head
- Position the New Print Head: Align it with the carriage.
- Reconnect Wires: Attach the thermistor and heater cartridge wires to the new print head.
- Secure with Screws: Tighten the screws to hold the print head in place.
5. Test the Installation
- Power On the Printer: Plug in and turn on the printer.
- Heat the Nozzle: Set the nozzle to a low temperature to ensure it’s heating correctly.
- Check for Errors: Monitor the printer qidi tech x-cf pro change head for any error messages or unusual behavior.
Following these steps will help you replace the print head without a hitch.
Troubleshooting Common Issues
Even with careful handling, issues can arise. Here are some common problems and their solutions:
- Temperature Fluctuations: Ensure the thermistor is properly connected and functioning.
- Filament Not Extruding: Check for clogs in the nozzle or issues with the feeder mechanism.
- Print Head Not Heating: Verify that the heater cartridge is connected and operational.
Addressing these issues promptly will keep your printer running smoothly.
Maintenance Tips for Longevity
To extend the life of your print head and maintain print quality:
- Regular Cleaning: Keep the nozzle and surrounding areas free from filament residue.
- Use Quality Filament: High-quality filament reduces the risk of clogs and poor prints.
- Scheduled Inspections: Periodically check all components for wear and tear.
Implementing these practices will ensure your QIDI Tech X-CF Pro remains in excellent condition.
FAQs
Q1: How often should I change the print head on my QIDI Tech X-CF Pro?
The frequency depends on usage and the types of filament used. Regularly inspect the print head and replace it when you notice signs of wear or decreased print quality.
Q2: Can I use third-party print heads with the QIDI Tech X-CF Pro?